Are you designing and building your own tiny house?
Don’t know where to start?
Are you trying to stay on budget and save money where you
can, without sacrificing quality?
No joke.
To get started on your build you’ll need to make 3 major
purchases: Trailer, Lumber, and Windows.
I’ve already written about how to save money on the trailer so here we go, let’s talk about windows.
Step 1
Start with a rough drawing of your tiny house design. That should give you a basic idea of the
number of windows you’ll need, the size and shape of them, as well as the
opening “type”. Some windows open up /
down (I know, not a very technical term. The proper term is "single hung") and some open side to side. (aka "double hung") For instance the windows over your kitchen
sink should probably open side to side. Also, more-well placed smaller windows
will be easier to source and better for a tiny house than just one or two, really
large ones.
All the windows and doors I need, fit into my SUV.
Step 2
Start collecting windows!
In order to make all of my windows “appear” to be uniform when I knew
they would not be, I decided that all of my windows would be double pane,
vinyl, and white, with NO pane grids.
Use your rough list of window sizes and types and go to craigslist,
Habitat for Humanity Restore, and other recycled material outlets and shop for
what you need with an idea of what attributes you’re willing to sacrifice.
Another way to add light and interest to a space is to use clear corrugated plastic siding.
For instance, if you want a window that is 30x32 and you
find one that is 30x34, assuming it won’t encroach on other walls, the stairs
or doors in the house; buy it! If you start out looking for white windows, but
you find an entire set of windows that will be enough for your entire build, for
a great price, but they’re cream colored, maybe re-consider your aesthetic?
Call around to window manufacturers and retail stores to
inquire how, or if, they sell returns.
Some manufacturers sell returns to the general public, some of them have
agreements with local recycle retailers and only sell through them. This is what I did and I was very lucky to
have discovered the “bone pile” of windows at Parr Lumber. They were happy to get rid of them and I was
more than happy to utilize them.
We are so thankful for Parr Lumber's support!
Step 3
Organize your windows. I made a spreadsheet that listed all of my windows, and which direction
they opened (or if they didn’t open) and what direction they opened. And, it wouldn’t hurt to double check the
measurements on the windows at this point as well. You can NEVER be too careful when it comes to
verifying this important feature and its impact on your design.
Step 4
Incorporate your windows into your design.
New windows and custom windows are very, very expensive and
I know many tiny house builders who paid over $3,000 for the windows for their
tiny house.
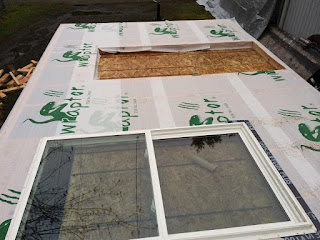
Our first wall, waiting to be raised!
If you’re a DIY builder who does not have thousands of
dollars to spend on windows, please don’t sacrifice the look of your house by
having only 2 or 3 of them because that’s all you can “afford”. If you START with the windows, and pay far-below-market-value,
and take your time to source them before you finalize your design, the overall
look of your house will benefit. (and
likely your peace of mind in the space as well….)
This is the exciting part!


The right windows makes such a big difference when it comes to saving energy and saving money.
ReplyDelete